Showing posts with label patchwork. Show all posts

Wednesday, November 30, 2011

-tote bag challenge!-


For The Sewing Summit we were given these awesome, HUGE bags full of swag.  They were just simple totes, but when we got home we were told that was on purpose.  They challenged us to remake our bags and make something unique as long as it was still a bag.  

 I went to my scrap basket and was going to do some "rainbowy" patchwork.  However, as I set my bag down I noticed the little 2.5" charm pack that had been part of our swag.  I had pulled it earlier for a different project, but I knew it was perfect for what I wanted to do!


So I embellished my bag with simple patchwork and a wonky star.  I backed the patchwork with some more canvas to make it extra sturdy since I knew a lot of stress would be put on the seams.  I wanted to use this bag for my more portable projects so I also cut the bag down and made it a little smaller by a few inches. 


 I decided to free motion stitch "Crafty Stuff" to add some more flair to the plain canvas.  I used some of the Aurifil thread that was also part of our swag! (Very serendipitous!)  It was a wool thread which I had no idea what to do with, but it was perfect for this use since it is a heavy, thick thread and makes the words stand out more.


I lined my bag with this fun starburst print.


For the back I just kept going with the patchwork.  I also took off the handles and replaced them with  these simple blue and pink patchwork ones!

I definitely enjoyed this challenge and now I have a fun project bag as well!  There is nothing like waiting until the last minute!  I have had this bag complete for almost a week and a half except for the handles.  The last day to enter was today, so I got my booty up to my machine and  finished it up! ;0)


Sunday, April 3, 2011

Placemats Complete and a Giveaway!


I finished the placemats for my kiddos this week!  Don't they all look so sweet together?


I put together a simple little tutorial on how to make these.  You can find it HERE.  They aren't hard to figure out, but if you are like me and sometimes don't want to do the math and figure out the right proportions please give it a try!


For Josiah's I used a fun little scrap pack that I found at my local quilt store.  Don't you just love those little characters?  Josiah isn't quite old enough to use this yet, but I thought I should just make his while I was on a roll or it would never get done!


Here is the back!  I used a green and brown stripe.  I really think these placemats are easily reversible!


For the quilting on this one I just did a simple crosshatch pattern.  I think I like this style of quilting best out of the three placemats I made.


This is Juliana's placemat.  I love the fun, bright pinks in this one.  This one is made exclusively of out my various Heather Ross  fabric pieces I have been saving and saving.


 I stippled this one in a variegated purple thread.  The quilting on this one really does pop out more on this one than the others, but I think I still like it. ;0)


I used this sweet little pink flower print for the back of hers.

You can also check out Felicity's placemat here.  

I have lots of these fabrics still leftover!  If any of you are interested, I will cut out enough squares for you to make your own patchwork placemat.  You can choose which set you would like: the boy, the pink/ purple, or the peach colorway.  Just leave me a comment and let me know which one you would like!  I will pick the winner, Sunday April 10th! Thanks for reading and happy sewing!

Patchwork Placemat Tutorial


Supplies
  • fabric scraps at least 3.5" square
  • Backing fabric- piece of fabric 18' x 14"
  • Batting- 18" x 14"
  • fat quarter to make own bias binding or a pack of 1/2" bias binding
All seam allowances are 1/4".

Completed placemat will measure around 17.5" x 13.5".


1. Cut 24 3.5" squares for your patchwork front.  I fussy cut most of my pieces to make sure I got my favorite little characters in there, so I used a 3.5" ruler to center them and cut them out that way. 

 2.  Now lay out your squares and make a pleasing layout.  Try to balance out your colors.  For this one I alternated light and dark fabrics.

3.  Sew  four squares together to make a strip and do this six times.  You can see my rows in the picture above.

4.  Press the seam allowances of the rows in alternate directions.  This makes it easier to match up your seams when you sew the rows together as they will make a little sandwich.


 5.  Sew your six rows together.  Press your seam allowances to one side. This is what your placemat should now look like!

 6.  Take a dinner plate and place it on opposite corners of the top square and trace to make your curve.


7. It should look like this.  Now trace around all four corners and cut to make them rounded.


 8.  Now take your front, batting, and backing fabric and lay them together as shown.  Baste them together to make a quilt sandwich.


9.  Quilt as desired.  For this one I stippled it, but there are no rules for this one!  These are nice and small and perfect for trying different techniques.


10.  Now trim up your backing and batting.  Add your bias binding using your preferred technique.  I like this tutorial on how to make five yards of bias binding out of one FQ, except I cut mine 2".  This tutorial will show you how to add bias binding to rounded corners!

Enjoy your completed placemat!

Tuesday, March 29, 2011

Patchwork Placemats


I have been wanting to make placemats for the kids for awhile now.  I wanted something eye spy-ish because my girls love looking for special little things.  I also wanted to use some of my Heather Ross goodies that I have been lucky enough to get my greedy little hands on.  

I was browsing through Etsy and looking at Japanese crafting books and saw a patchwork placemat with rounded edges and knew that is how I wanted to do mine.  Someone asked what I meant by zakka, which I referred to in my mug rug tutorial.  Zakka is a term that Japanese crafters use for handmade household type items like placemats, potholders, bags, etc.  The items often involve cute little critters, patchwork, and linen. Ayumi's blog, Pink Penguin, is a good example of this style of crafting. Here are a couple of my favorite Etsy stores for zakka fabrics and trims and Japanese crafting books


 So back to the placemat...I fussy cut all my little Heather Ross scraps and pieces and pieced them together.  I do love how all her fabric lines go so well together.


 For the back I used this sweet little David Walker print that I had leftover from making Juliana's Ice Cream Top.  I quilted it just by outlining each edge of the squares which you can see better here on the back.


Then I made a little reversible napkin and stamped some twill tape with Felicity's initial as this set is going to be hers.

I bound it in some red polka dot bias double fold binding, and...ta da!  A cute little patchwork placemat set.  I am also going to make one for Juliana and Josiah, and put them in their Easter baskets.  I have plans to do a little tutorial for these placemats as well that I hope to have up this weekend!  You can find the tutorial HERE.

In other news, I have re-opened my Etsy shop to try to finish clearing out the patterns I still have leftover.  I have some good ones including some by Pink Fig, Bari J, and Anna Maria Horner!  They are all 40% off, and you can use the coupon code "BLOGREADER" for an extra 5% off!  Thank you for your support and happy sewing!

Friday, October 8, 2010

Savvy Seasons!


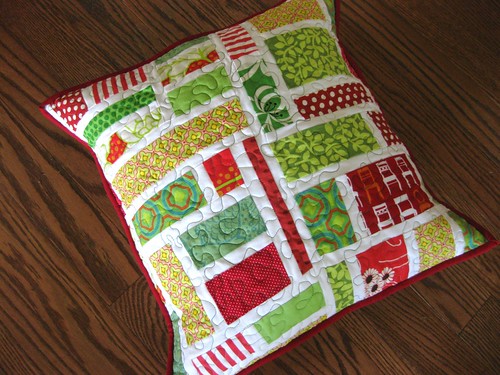
Okay, so maybe I have become a little obsessed with these fun swaps. I joined the Savvy Seasons Swap. You are supposed to make an item for your partner for whatever season they pick. My partner requested Christmas. She seems like a bright, modern girl, so I went with something a little funky. I loved this tutorial by Oh Fransson. It was fun to piece together, and I really did just use almost exclusively scraps for this pillow. I did make it smaller though. This pillow cover fits about an 18" pillow form. I free motion quilted over it with some fun variegated green thread. Free motion quilting still makes me tense up at first as I start, but I slowly relax as I go along and start to enjoy myself.


This is the back of the pillow. I found this fun Christmas shopping print by Alexander Henry at Joanns. You never know what you will find at Joann's!


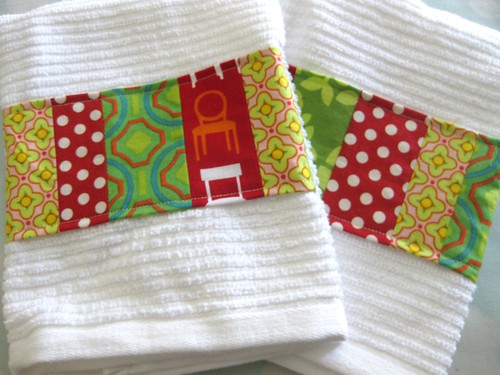
In my kitchen towel kick I also made some little matching kitchen towels and included a couple of other little Christmas things for her. Hopefully, she likes it!

Working on little things...

Having been sick with a horrible head cold...I admit to watching a lot of movies at night and not sewing. So, my Schoolhouse tunic is all cut out but not put together yet. I am hoping for some good sewing time at some point this weekend. I find clothes harder to work on in little chunks of time. I lose my focus...and my interest.

So, I present you with a growth chart! I made this awhile back for Juliana's birthday. Maybe it is a five year old thing, but she is absolutely obsessed with how big she is getting. She was making me measure her every day if not multiple times a day. In order to help satisfy her growth checking needs, I made her this. Now she can check herself! I did it "rainbow style" since that is the rage in Juliana-land. It was a pretty quick little project. I got the pattern from Stitch Magazine (I believe it is the Spring 2010 issue.)

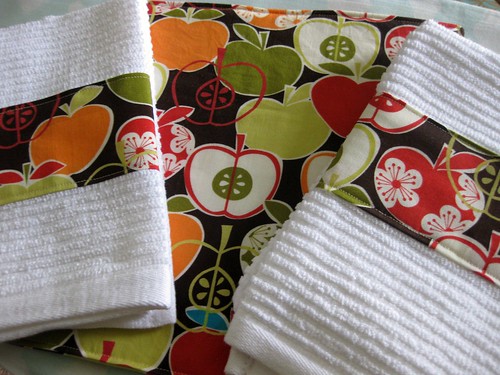
The past few days have actually felt like fall. Hurray! So I whipped up these little kitchen towels (I bought these from Target and just embellished.) and trivet to make my kitchen reflect my excitement for cooler weather. ;0)
Related Posts Plugin for WordPress, Blogger...