Showing posts with label home decor. Show all posts

Saturday, November 5, 2011

-pillows-


 I am finally getting around to showing the finished pillow I made for The Pillow Talk Swap.  I had a really hard time getting a good angle for this pillow for some reason.  Every angle just looked slightly off to me...ah well.  My partner for this swap is definitely a fun, cheery type person, so I went with something bright and scrappy.  For these blocks I used this template that I found via Flickr.  I love making things from my scraps.  I love hunting through and finding fun little pieces of fabric that bring back memories from past projects.  This block was perfect as well for some of those odd shaped pieces I have held on to.


Overall, I was pleased with how the pillow turned out, but I think I wouldn't have used variegated thread for the quilting.  For some reason, it ended up looking just a bit sloppy to me.  This pillow isn't the biggest.  It only came out to about 16", but sometimes it is nice to have a smaller pillow- I hope!  I added some turquoise piping around the edges, which I liked for the "pop" factor.  


For the back I just did a simple envelope closure with bright sunburst fabric I have had in my stash for awhile.


Last week I also received my super awesome pillow from fionapoppy!  This pillow is full of fun, simple details that really just make it something special.  I love it!  Plus, now I have a pillow to go along with my Authentic quilt!  
  

I love how she added the little "Make Life Beautiful" quote into that one square.  

Hope you all are having a wonderful weekend!  The temperature here has dropped twenty degrees, and I can finally say that fall is here!  Yay!


Sunday, April 3, 2011

Placemats Complete and a Giveaway!


I finished the placemats for my kiddos this week!  Don't they all look so sweet together?


I put together a simple little tutorial on how to make these.  You can find it HERE.  They aren't hard to figure out, but if you are like me and sometimes don't want to do the math and figure out the right proportions please give it a try!


For Josiah's I used a fun little scrap pack that I found at my local quilt store.  Don't you just love those little characters?  Josiah isn't quite old enough to use this yet, but I thought I should just make his while I was on a roll or it would never get done!


Here is the back!  I used a green and brown stripe.  I really think these placemats are easily reversible!


For the quilting on this one I just did a simple crosshatch pattern.  I think I like this style of quilting best out of the three placemats I made.


This is Juliana's placemat.  I love the fun, bright pinks in this one.  This one is made exclusively of out my various Heather Ross  fabric pieces I have been saving and saving.


 I stippled this one in a variegated purple thread.  The quilting on this one really does pop out more on this one than the others, but I think I still like it. ;0)


I used this sweet little pink flower print for the back of hers.

You can also check out Felicity's placemat here.  

I have lots of these fabrics still leftover!  If any of you are interested, I will cut out enough squares for you to make your own patchwork placemat.  You can choose which set you would like: the boy, the pink/ purple, or the peach colorway.  Just leave me a comment and let me know which one you would like!  I will pick the winner, Sunday April 10th! Thanks for reading and happy sewing!

Thursday, February 24, 2011

Simple Table Runner


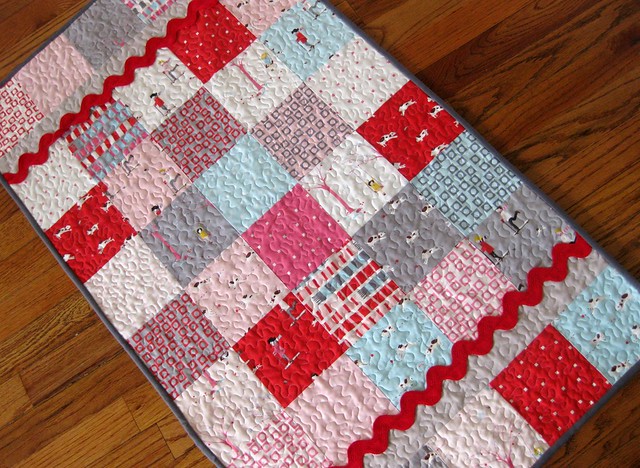
I was lucky enough to get my hands on a charm pack of Aneela's Sherbet Pips around Christmas.  I knew I wanted to make a table runner with it.  I wanted to keep it a simple pattern because the fabrics themselves are just so darn cute.  I found this easy table runner pattern on Moda Bake Shop, and it was just perfect!  I used some light gray for the little bit of sashing and some darker gray as the binding.   The giant red ric rac really jazzes it up, I think, in just the right way.


I love how this turned out, and look how much better my stippling is getting!  I was so pleased with myself. Hah. ;0)  I am still having a tiny bit of tension issues on the back though.  Some spots just look kind of skipped over if that makes sense.  I tried adjusting the tension a couple of times, and it is only happening in certain spots.  I am using a Janome MC6600.  Any ideas?

I am linking this one up to Amy's Sew and Tell!  There are always lots of fun projects that are shared!

Tuesday, February 22, 2011

The Pride and Prejudice Pillow


(I love this picture of Colin Firth.  I used to have this picture as my desktop background on my computer, which my college room mate teased me mercilessly for. *cough* Are you reading this, Sophie?)

"Pride and Prejudice"- if you haven't read it, well....better get to it!

  When Sew Mama Sew announced their pillow contest, I was a little deflated when they said they wanted a pillow with "words to live by".  I kept looking at all the fun, spunking sayings, but they just weren't "speaking" to me.  Then I remembered this etsy shop I found around Christmas, and inspiration came. ;0)  I also thought this idea would work well for Lil Blue Boo and Dharma Trading Design Challenge.  Two birds with one stone!


I used Mr. Darcy's original proposal to Elizabeth.  

"In vain have I struggled.  It will not do.  My feelings will not be repressed.  You must allow me to tell you how ardently I admire and love you."

These words don't necessarily scream "words to live by", but they do to me.  In the book (if you haven't read it) this declaration is the first sign that Mr. Darcy has any romantic inclinations towards Elizabeth.  Before all you see is a hard, prideful man who always criticizes.  I remember the way my heart stopped when I first read this declaration of love.  *gasp*  The man.loved.her....ardently!  These words don't immediately win over Elizabeth, but because he spoke them he does eventually win his lady's heart.  These words remind me that things aren't always as they seem, and not to be afraid to say what is on your heart.  


Don't give up on finding your Mr.Darcy, ladies!  I was lucky enough to have found mine. ;0)


 I tried to keep things simple with this pillow and make it something you might find in Jane Austen's house.  For the words I found a fun Jane Austen font, typed it up, and used t-shirt transfer paper to iron them on to some notebook type fabric.  I then cut this out, added some piping, and framed it in linen.  I added some chiffon roses to one side for a romantic look. :0)  For the binding I used a black and white stripe print from Sweetwater's Authentic line, and I added some cream lace that I had in my stash that couldn't help but make me think of Mrs. Bennett.


I don't know if this pillow is going to win any prizes, but I have to say that I really had fun making it!  

Friday, February 18, 2011

Elephants on Parade Pillow


Spring has arrived here in California and with it many allergies, plus add some sort of virus and a teething baby.  Well, I just haven't gotten out of the house much, but I have been productive in the sewing department.  


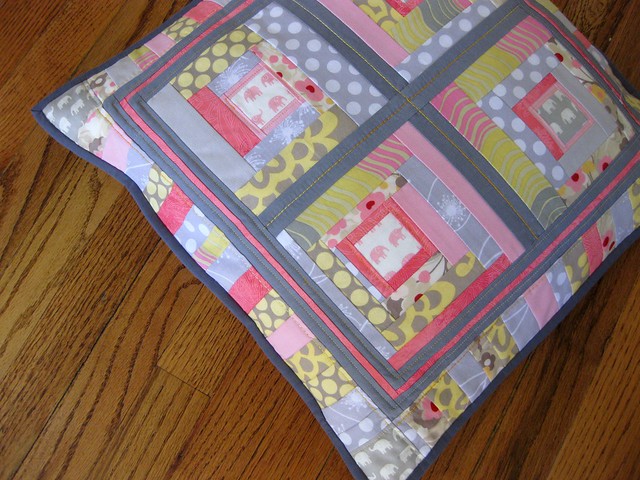
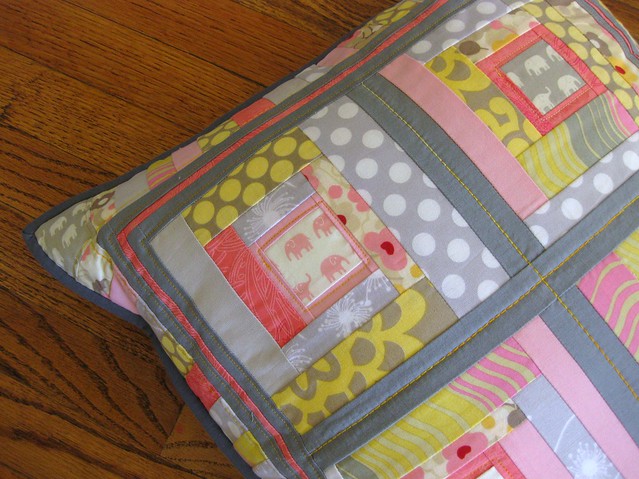
Remember this quilt block that I made for my bee quilt?  I loved this block so much.  I couldn't get it out of my head to make a pillow just like it, but I am laaaazzzyy.  So I decided to just use the quilt block I already made for the quilt for the pillow instead.  I added some thin borders of gray and a bit of the bright pink.  I love how the bright pink blends with the rest of the fabrics but really pops and catches your eye.  I then added a scrappy border and put some more elephants in the corners.  I wanted to use the gray for the binding but ran out of the medium gray I was using for the sashing, but luckily I had some Kona charcoal that worked really well.  Whew.  Didn't have to break the fabric fast. ;0)


For the quilting- I kept it simple.  I used a variegated yellow thread.  My machine has this triple stitch that I really like because it makes the stitching stand out more and kind of has a hand stitched look.  I used that for the center sashing and then outline stitched the center blocks and outer sashing.


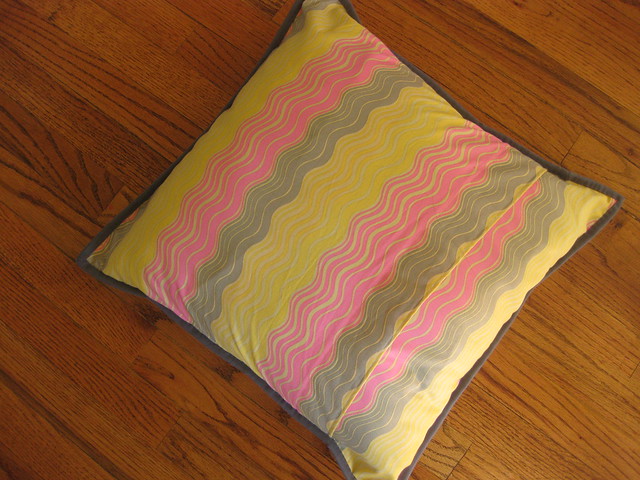
For the back I used this Amy Butler Midwest Modern print, since it incorporated all the colors that I used for the front.


Just one more shot... just because...:0)

I am entering this one into Rachel's Pillow Party!


Friday, December 17, 2010

Some Pillows and Giveaway Winners!

Thank you to all who entered the giveaway!  

The winners are #111- TZel
#144- Briana Arlene!

I have sent you both an email!

Berns-  If you are reading this...go no further!  Not until after Christmas. ;0)


I finished my last Christmas present up the other day!  Yay!  (Well, I would also like to finish Josiah's quilt for Christmas, but I am not going to stress if it doesn't happen.  He is a forgiving baby. ;0p)  I got a bunch of French General scraps from my local quilt shop.  I really love a lot of their prints.  My brother just made his wife a window seat, and my mom made her a slip cover for the bench.  However, she still needed pillows, and I immediately thought of these scraps.   This first one is my favorite.  I cut some different sized sqaures and framed them.  I think just quilted it lightly around the squares.


For the other "main" pillow I made a patchwork pillow using the Summerhouse Pillows pattern.  I love how easy her method is, and I have made several of these.  I quilted this one to by just quilting along the sides of the squares.


I also made a couple of smaller pillows out of this fun Japanese linen blend by Lecien.  


 Here they are all together.  It has been rainy the past couple of days, so lighting has been bad.  I made two of the kitchen pillows but only had one form to fill it.  I think they all go nicely together though.  I love making pillows.  Such a satisfying way of jazzing things up.

I hope everyone is having a blessed Advent!  I finished my shopping last night!  No way I want to go to the stores this weekend.  Now I just have to wrap them all!

Friday, October 8, 2010

Working on little things...

Having been sick with a horrible head cold...I admit to watching a lot of movies at night and not sewing. So, my Schoolhouse tunic is all cut out but not put together yet. I am hoping for some good sewing time at some point this weekend. I find clothes harder to work on in little chunks of time. I lose my focus...and my interest.

So, I present you with a growth chart! I made this awhile back for Juliana's birthday. Maybe it is a five year old thing, but she is absolutely obsessed with how big she is getting. She was making me measure her every day if not multiple times a day. In order to help satisfy her growth checking needs, I made her this. Now she can check herself! I did it "rainbow style" since that is the rage in Juliana-land. It was a pretty quick little project. I got the pattern from Stitch Magazine (I believe it is the Spring 2010 issue.)

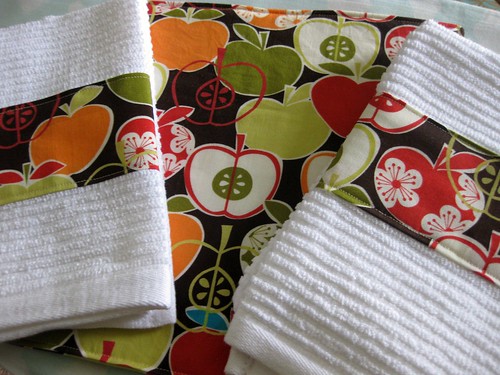
The past few days have actually felt like fall. Hurray! So I whipped up these little kitchen towels (I bought these from Target and just embellished.) and trivet to make my kitchen reflect my excitement for cooler weather. ;0)
Related Posts Plugin for WordPress, Blogger...