Tuesday, March 29, 2011

Patchwork Placemats


I have been wanting to make placemats for the kids for awhile now.  I wanted something eye spy-ish because my girls love looking for special little things.  I also wanted to use some of my Heather Ross goodies that I have been lucky enough to get my greedy little hands on.  

I was browsing through Etsy and looking at Japanese crafting books and saw a patchwork placemat with rounded edges and knew that is how I wanted to do mine.  Someone asked what I meant by zakka, which I referred to in my mug rug tutorial.  Zakka is a term that Japanese crafters use for handmade household type items like placemats, potholders, bags, etc.  The items often involve cute little critters, patchwork, and linen. Ayumi's blog, Pink Penguin, is a good example of this style of crafting. Here are a couple of my favorite Etsy stores for zakka fabrics and trims and Japanese crafting books


 So back to the placemat...I fussy cut all my little Heather Ross scraps and pieces and pieced them together.  I do love how all her fabric lines go so well together.


 For the back I used this sweet little David Walker print that I had leftover from making Juliana's Ice Cream Top.  I quilted it just by outlining each edge of the squares which you can see better here on the back.


Then I made a little reversible napkin and stamped some twill tape with Felicity's initial as this set is going to be hers.

I bound it in some red polka dot bias double fold binding, and...ta da!  A cute little patchwork placemat set.  I am also going to make one for Juliana and Josiah, and put them in their Easter baskets.  I have plans to do a little tutorial for these placemats as well that I hope to have up this weekend!  You can find the tutorial HERE.

In other news, I have re-opened my Etsy shop to try to finish clearing out the patterns I still have leftover.  I have some good ones including some by Pink Fig, Bari J, and Anna Maria Horner!  They are all 40% off, and you can use the coupon code "BLOGREADER" for an extra 5% off!  Thank you for your support and happy sewing!

Friday, March 25, 2011

House Love!


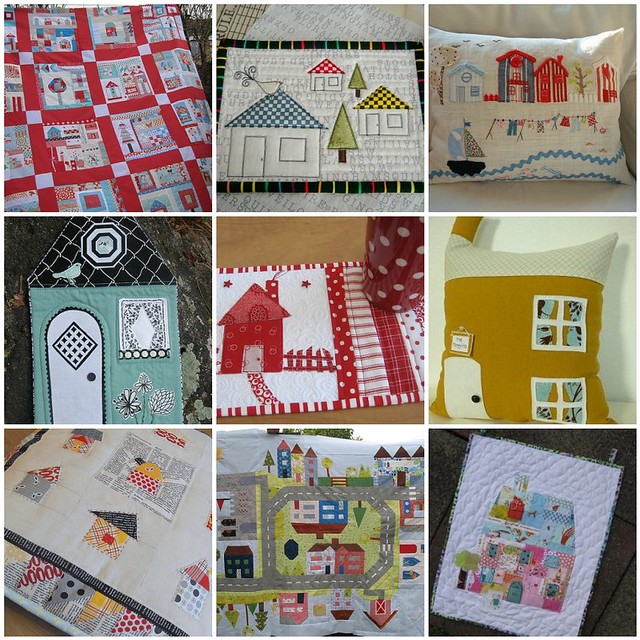
Thank you so much for all the lovely feedback on my little house mug rug tutorial. If any of you make one, I would love to see it!  There is something about little houses that is so attractive. It is like making your own, creative little home without all the hard work and cleaning! Hehe.

Here are some of my favorite creative houses made by others!  Happy weekend!

Wednesday, March 23, 2011

At Home Mug Rug Tutorial

Welcome!  I am excited to be a part of Mug Rug Madness!  Take a peek at my little house mug rug and stop by at Two More Seconds at this post to enter the giveaway to win one of these little guys!


I tried to go with something easy and fun to personalize!  I love Zakka style crafts and definitely had this style in mind when I wrote this tutorial.  These little mug rugs are quick to whip up.  I think they would make great gifts for teachers (make it a school house), kids, grandparents, or anyone else who needs a little house for their mug!


Supplies

Fabric scraps
Batting
Thread
3" Twill tape or ribbon
Lace, ric rac, scraps, or anything other trims you would like to decorate your house.

Fusible web (optional)

All seam allowances are 1/4".

1.  Cut one 6.5" x 4.5" rectangle outof your fabric for the main body of the house.  For the roof of your house you need to cut out a triangle. 


2. Draw a line that is 6.5".  This is going to be the base.  Mark the middle of your base and draw a line 3.25" perpendicular to your base.  Draw the sides of your triangle by joining the ends of the base line to the top of the 3.25" line.  Use this pattern piece to cut out your roof.

  
These are your two pattern pieces you now should have.


3.   Now lay your roof on top of your rectangle right sides together and sew together. Press the seam allowance toward the bottom.


At this point if you would like to add some trim at the roof line this is when I add it.


4.  Use this front piece to cut out the back piece of your mug rug as well as your batting.


5.  Take the front, back, and batting and sandwich then together so that the front and back are right sides together and the batting is on top.  Fold your 3" piece of twill tape in half and place it on one of the sides of your roof between the front and back pieces and angled towards the center.

6. Sew together starting at the bottom of the house and leaving a gap of about 2.5" to turn it out.


7.  Trim the bulk off the corners of your rug and turn right side out.  Press.


7.  Now you are going to topstitch around the sides and bottom portion as close as you can to the edge to close the gap that is left.


8.  Adorn your house!  I left my edges raw and used scraps to add windows and doors and just stitched close to the edge.  (I used fusible web on some of the mug rugs to help my scraps stay stable, but they are so small you might not find it necessary!) This is also a great opportunity to use those fun decorative stitches on your machine!  Make bushes or flowers.  I used a round decorative stitch to make the door knob on my doors.  Add bits of lace and ric rac.  Use some of your favorite novelty scraps and fussy cut little characters to live in the house.  Stamps are also a fun, easy way to add words or names.  Have fun with it!  Make it as simple or as ornate as you like!


Sunday, March 20, 2011

Flirting the Issue


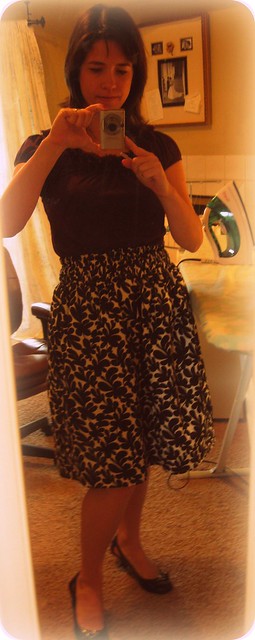
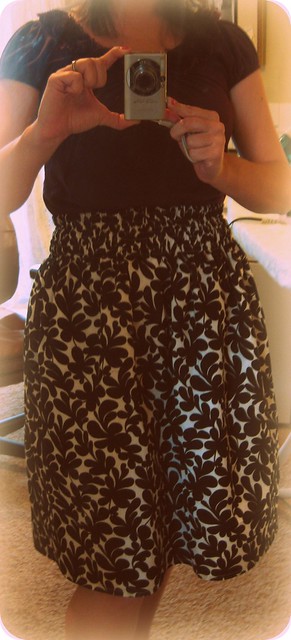
I was looking through my stash of fabrics and came upon this black and white fabric that I got well...lets say awhile back.  It is a light cotton.  I was originally going to use it for a shirt, but it is such a busy print that I thought it might be too much.  When I pulled it out this time, I thought about Anna Maria Horner's new free skirt pattern called Flirting the Issue.  


This is a super easy pattern that just requires you to cut two rectangles from your fabric and lining.  The cutting and sewing came together within an hour.  Threading those four pieces of elastic, however, took me another hour and a half!  I finally had to turn on a movie to entertain myself. ;0)


In other news, have you heard that Mug Rug Madness is starting tomorrow?  Erin of Two More Seconds is putting it all together, and I am lucky enough to be a part of it.  Come back on Wednesday to check out the tutorial!

Saturday, March 19, 2011

The Serger Reappears!


My little leprechauns!  They came back from preschool filled with wonder about leprechauns on Thursday.  Who are they?  Why do they like gold?  Why are they so tricky?


Juliana was told that she must wear green on St. Patrick's Day, and she, of course, didn't have anything green in her wardrobe, and I, of course, promised to make her something to wear.  Then I, of course, procrastinated until the night before and frantically sewed until midnight.  ;0p  Luckily, I picked an easy little dress to make.  This is Butterick B3772.  It is just a simple jumper.  I made a size six, but shortened it a little.  It is a little big on her, but I think will provide some room to grow.


 I see making another one of these.  Iveyc95 has this awesome tutorial to make a cute ruffled version of this, and I definitely want to give it a go.


I also made Juliana this cute little apron skirt a couple of weeks ago for Mardi Gras.  This skirt is from the book Little Girls, Big Style.  I *love* this book.  She takes four simple patterns and shows you how to make all sort of fun variations.  None of the patterns are very complicated, but that is just the way I like it.  I have another outfit that I have made from this book already, and this is definitely going to be my go to book this summer.  This skirt was a pretty easy afternoon project.  I jazzed the skirt up a bit with some pink ric rac and shabby chic flower, and the girl was ready to party.

Now the question is where did she learn to pose like this?!


  It seems like only yesterday she was just my sweet little, chubby three year old posing in her little twirl skirt. *sniff, sniff*  


Sunday, March 13, 2011

Swaps Received!


The past couple of swaps I have been in I have received some really wonderful items!  For the Spicing Up The Kitchen swap I received this awesome Kitchaid mixer cover from Kati of From The Blue Chair.  It goes so beautifully in my kitchen! You must check out her blog as she makes the most fabulous quilts!  


I also received this wonderful table topper for my coffee table from Jenny of mommymae for the Urban Home Goods Swap.  I said I wanted something for spring/summer, and I think this fits the bill perfectly!  I love the two half dresdens!


Yesterday I got my Castle Peeps quilt all cut out at our Bakersfield Modern Quilt Guild sew in.  I have also made some clothes for the girls.  I don't know how people get their kids to do all these fun poses in their new cute clothes.  Someone always seems to spill some juice all over their cute outfit or *ahem* cry every time I attempt at picture taking.  I'll try again later this week. ;0)

Tuesday, March 8, 2011

Happy Fat Tuesday!


Happy Fat Tuesday!  I have made my first fabric purchase of 2011 to celebrate!

Have you seen that Liesel of Oliver + S has now come out with patterns for women called Lisette?  They are part of Simplicity's new line of patterns.  I just love her children's patterns and am excited to give these a try for some spring clothes  Plus, she has also designed a line of fabrics for clothing for Joann's!  I picked up two  lawn fabrics, which are so soft and lovely.  I also picked up a chambray, which I have never tried before, to make some shorts for the girls.
   

I also have a new nephew!  Yay!  I now have a reason to cut into this stack of Castle Peeps!

I am cutting back on my internet time for Lent after reading this inspiring post by a lovely Catholic mama.  Love her blog!  She always inspires me to be a better mother!  However, I am sure I will still be popping in here and there!


Monday, March 7, 2011

New Spring Bag!


The last bag I made was starting to look a little dingy, so it was time for a new one!  I definitely wanted to make something with spring in mind.  I have loved this Drawing Room fabric by Anna Maria Horner at first sight, and I have been hoarding this yard of fabric for what seems like forever.  I even have a little bit left for something else! 

Look at this large back pocket!

 The pattern is The Knotted Bag by Craft Apple  .The pattern was very well written with very helpful diagrams and instructions, and I think it produces a very well made bag.  The only thing I don't like about it is that the bag doesn't have gussets.  I think gussets give bags a nice depth.  I made the large bag, as I always have lots of stuff going into my bags.  I love the size!  


This is the inside- made with some Good Folks.


I love the droopy bow!

The only thing I changed for the pattern was to add an inch to each side of the straps because they looked a little short to me, and it gives a little more wiggle room.  

Thursday, March 3, 2011

My Simple Authentic Quilt


I finally finished my Authentic quilt!  I have been working on the binding a little bit each day this week while watching Doc Martin.  We *love* Netflix Instant, and Doc Martin is our newest addiction.  For this quilt I wanted something incredibly simple.  I was inspired by this tutorial , and if you are looking to make your first quilt I think it would make a great one to start with. I wanted mine a little bigger though, so I added a little more here and there- where I felt it needed something.


For the back I used Kona Charcoal and added a scrappy off centered middle.  I almost like the back as much as the front, since you can see the quilting a little better.  I just did a simple zig zag.  


I made this quilt for our family room, and I am really enjoying cuddling under it while we still have a bit of chilly weather.  Spring is coming in full force!
Related Posts Plugin for WordPress, Blogger...